Saturday, 16 March 2013

Another Flower Pot Card.


I love this card design. I used it once before for a class that I ran in a different colour way and enjoyed the chance to try out THIS tutorial on SplitCoastStampers again. SCS is a great resource for projects and ideas using Stampin' Up! Stamps and Products, and there are galleries dedicated to almost EVERY SU stamp set you can imagine showcasing other peoples beautiful handiwork If you've not looked at the sight before, check it out: you're missing an invaluable treat!
For the flowers I used the gorgeous Mixed Bunch stamp set, in Daffodil Delight, Cherry Cobbler, and Pool Party (which doesn't show up very well in the picture but looks so pretty in real life!) The pot is made from Soft Suede and tied with Cherry Cobbler Seam Binding Ribbon. This was a card for a green fingered friends birthday, but it would work equally well for any number of occasions especially with Easter just around the corner:) I'm thinking next time about trying out some ribbon flowers instead of stamped ones. We'll see how that goes.

Tuesday, 12 March 2013

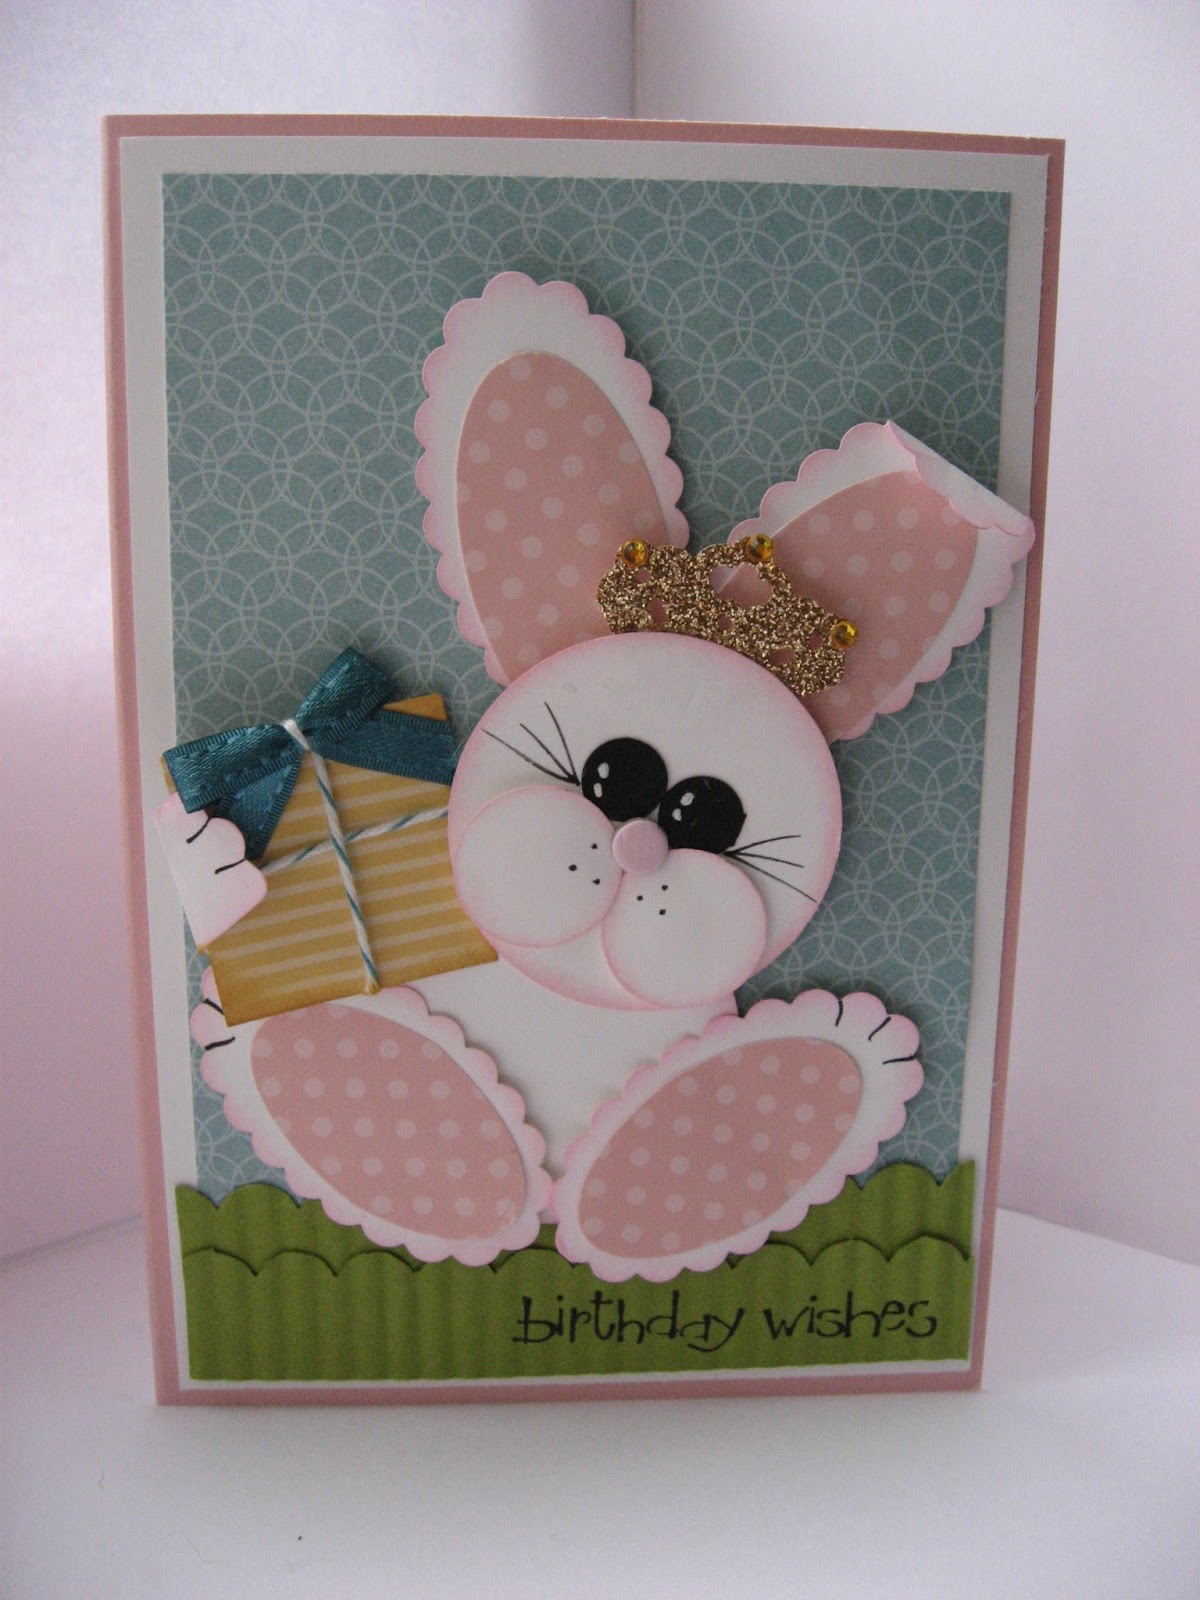
Princess Bunny Birthday.


A Punch Art Bunny Princess to celebrate a sweet girls birthday. Lili you are growing up too fast! 

I followed THIS basic tutorial to make the bunny but changed it up a bit to work with the punches that I had, using the Scallop Oval Punch for the ears and feet. I don't really make Easter cards, not sure why, but I had to have a reason to make this gorgeous little bunny. My niece was having a Princess Party for her birthday and as I made a Princess card last year I wasn't sure what to do, but hey; add a tiara and voila! You have a Princess Bunny:))) I punched the tiara out of a sheet of Champagne Glimmer Paper, then added a few diamante's its a shame they don't really show up in the picture.

  I'm sure over the next few years I will need to 'Princessify' a few more punch art animals in order to meet the young Disney lover's birthday card needs!

Oh and welcome back to the snow. You've got to love England, always keeping you on your toes! This time last week it looked like summer was well on its way, and now my poor daffodils are all lying dead in the snow and the extra quilt is back on the bed. little Miss and I felt grumpy and rough today so i made the decision we were 'snowed in' and had a pajama day and snuggled on the couch watching films. You just can't beat little girl snuggles.   


post signature

Saturday, 9 March 2013

To My Sweet Mother

Each year I find it hard to know what to write in my Mother's Day card, how do you sum up 30 years of gratitude and love in a few lines? You can't can you, really. Poets and card companies have been trying for years, some more successfully then others! I hope she knows though, just how thankful for her and the life she gave to me. I hope I show her through my actions, which I think means more then a card year after year.

For this years card I went for a garden theme, the idea was that the letters were the flowers growing out of the pots. I used the scallop oval punch cut in half and inked around the edges to make the pots, the grass was made using the scallop edge punch, then I cut wedges into the tops to make it grassy. Adding a few butterflies cut with the Beautiful Wings embossilit die stopped the card from looking too bare and I finished it with a little ribbon tied around the base, Madison Ave, Island Indigo Ribbon (from the Sale a Bration set) on one card and Stitched Summer Starfruit ribbon on the other card.


Friday, 1 March 2013

Henry Says "Happy Birthday Jack!"

It's my Nephew's birthday today. Happy Birthday Jack! Seems just like yesterday I was posting the Pokemon Card I made for his last birthday! This year apparently he is mad on Moshi Monsters(????) I know I should Google it but I haven't got the first clue really, though it's about time there was a craze going around that wasn't a craze when I was younger as well! Anyway, pleading ignorance I thought I would test run my brand new 'Henry Says' stamp set from the Spring/Summer Catalogue. I stamped Henry on some of the Madison Avenue DSPapaer (that you can get FREE through the Sale-a-bration promotion.) Then I 'fussy' cut around the outline and raised him up from the card surface using Dimensionals.
  I like having a funky patterned Elephant, it makes me think of Elmer, or those trippy elephants that show up in Disney cartoons so often:) and he makes me smile, which can't be a bad thing. I hope it makes the Birthday Boy smile as well.

Monday, 25 February 2013

Bloomin' Marvelous


Here is a cute little set of 3"x3" cards that I whipped up last night. It may be -1•c outside but I am full of the joys of spring, so I wanted to choose some equally fresh, spring-like colours for this project. I opted for Daffodil Delight, Lucky Limeade, and Regal Rose in card stock and ink, don't they look pretty together!? The stamp set is Bloomin' Marvellous and is one of the gorgeous Sale-a-Bration sets on offer this year. The finishing touches were some bakers twine, itty bitty flowers and a few Basics Pearls. The cards come together so quickly they would be perfect for a quick gift or if you need a few cards in your bag, for emergencies.


Wednesday, 13 February 2013

My Sweet Valentine

I finally had five minutes to myself this evening. Whenever I make plans that involve doing things without my husband being here to find out, he inevitably comes down with a devastating strain of man flu which has him lolling around the house getting under my feet and feeling very sorry for himself! So tonight I had to grasp the time I had to myself to quickly construct my poorly sweet heart a valentines card. I hope he likes it!

Tuesday, 5 February 2013

A Party to Remember!

I am finally getting around to putting up a post about my Mum's 60th Party; that took up so much of my time and attention over the last few months! I will let the pictures do most of the talking! Ironically for a Stamping Blog; it completely slipped my mind to take a single picture of the ready made scrap book that I made up for Mum to record the night in. I made up 20 double sided pages in the colours of the night; black, white, and pink, and decorated them with die cuts, brads and pretty ribbons, so the pages were all ready to add pictures and mementos of the night.


The cake was a task in its self being a 3 tier job with 30 handmade dog roses. Getting it made in time with a very active and demanding 1 1/2 yr old, was nothing short of a miracle. I went for a different cake flavour for each tier. Victoria sponge for the top, Lemon sponge with lemon curd for the middle( my favorite) and Chocolate with chocolate ganache for the bottom. For my first attempt at a tiered cake I have to admit to being pretty chuffed with the results and they're all thanks to the wonderful step by step directions in the Peggy Porschen book 'Romantic Cakes'. Her Cakes, and her books are exquisite and such an inspiration to me. I own all of her books and often flick through them for inspiration or just to admire the beauty and there are some excellent 'Go-to' recipes. I remember Mum seeing it in the book when I was flicking through it with her just after I bought; it and saying how lovely it was so I made a mental note ( always a forward thinker!) and just knew this cake would be what I would be cracking out for her 60th. She deserved something spectacular!
 

   My sweet wonderful husband worked like a trooper getting all the decorations up all by himself while Sis and I slaved away in the kitchen cooking up a feast! It is quite a task catering for so many people, I hope Lil' Miss has no plans of ever getting married! I don't think I could face something on this scale EVER AGAIN, maybe with a little more help...!


   If a buffet isn't great enough, getting to enjoy it 2 days in a row is pretty fabulous. There were 2 parties, of course! The first on Friday night and then the 'After Party' clearing up on the Saturday morning, in fact I think I enjoyed Saturday more as the pressure was finally off and my outfit was a darn sight more comfortable!We cranked up the music scoffed toasted cheese sandwiches, and cleared away all the goodness of the night before.

                        Phew so that was it. 3 months of work over and the effort was all worth it!
                         Mum I love you! And of course you only turn 60 once. Thank goodness!


Tuesday, 22 January 2013

Sale-A-Brate! It's That Time Again!!!!!


This is the most exciting time of year to be involved with Stampin' Up! whether you're a Hostess, a Customer, or thinking of signing up as Demonstrator there are so many more reasons to shop with Stampin Up! During the Sale-A-Bration.

From today until the 22nd March 2013 you can qualify for an array of exclusive stamp sets, a gorgeous Designer Series Paper set, and a whole host of accessories. All you need to know to start earning is right here: 

Host A Party: If your party totals £150 you earn a FREE pack of Silver Glimmer Paper + £25 Hostess Credits
Hold a Party totaling £300+ Earn a FREE pack of Silver Glimmer Paper, A FREE Product Bundle (stamp set, buttons, DSP) £50 Hostess Credits and 50% off ANY full priced item!

Shop: Get your wish list together! When you spend £45 you can pick any one of the FREE Sale-A-Bration items. For EVERY £45 you spend you can pick another free item. Spend £150+ and you can even qualify for exclusive Hostess benefits, plus all those free items!

Join: If you've considered joining up as a Demonstrator there couldn't be a better time. Not only will you earn 20% discount off the products you love but you can earn money sharing what you enjoy with others. As we celebrate Stampin' Up!s 25th Birthday this year you can also receive 25% more in your starter kit. You can pick £162.50 worth of products and pay just £99! 

For all the exclusive stamp sets and accessories check out the the Sale-A-Bration leaflet, and start trying to just which item you want to earn first! You can order any time and have your order delivered right to your door, or contact me today and book in your own Sale-A-Bration party. I can't wait to share with you all these lovely sets. Which is your favorite!? 

post signature

Sunday, 20 January 2013

Happy 60th Mama!

My Mum turned 60 on Tuesday. She is officially twice my age now! Good going Mum;) I started planning a surprise party for her in November and have been flat out trying to make it perfect for her. The party was last Friday, I'll do a post on that soon but just quickly wanted to share with you the card I made for her. I CASED it from this years Catalogue but swapped the sentiment for one from a gorgeous Sale-A-Bration set that you will soon be able to get your hands on! And don't you just love that Lattice Die! Such a gorgeous shape, perfect for adding an elegant accent to your cards or pages.

Wednesday, 2 January 2013

Welcome New Arrivals!

So here we are in 2013. Happy New Year everybody! We had a quiet night at our house this year. After a very hectic Christmas I just wanted to see the New Year in with those I love most. There were some pretty impressive fireworks going off in the neighbourhood so I sat up snug in my bed, watched the fireworks and thought about how blessed I am to have the wonderful life that I have.

We have all been on alert these last few weeks waiting for my SIL to have her first baby. She's been in and out of hospital but still no sign, baby's cozy and warm right where she is and has no intention of moving on her own! Anyway to get in early I have made her 'welcome baby' card using a gorgeous punch art card that I saw on Google I will find the link to the site where the lady talks you through how to make the card yourself, and post it up here, when I get the chance:) Here's the LINK go check it out :)))

I love New Years and New Beginnings they are both so full of hope and promise. What are you most looking forward to in 2013? I know I can't wait until Sale-A-Bration starts at the end of this month. Who doesn't love a freebie!?

Sunday, 16 December 2012

Hanging Ornament


Here's a little something I've been working on in the evenings. My favourite Christmas colours are Gold Purple and Cream, Not very traditional I know but I just love that combination. I followed THIS tutorial on YouTube for the basic technique and changed it up a bit for what I wanted. All the bauble stamps were from the Ornaments Keepsakes stamp set and were cut out using the co-ordinating framelits. The Ink is Elegant Eggplant, I wanted a deep rich purple and this fit the bill perfectly. It did look VERY dark when I first stamped it - black almost but became much lighter as it dried (phew!) For the centres I cut out two large snowflakes and four medium snowflakes from the Snow Flurry Bigz Die, from Champagne Glimmer Paper. Those were topped with buttons from the New Vintage Buttons selection and then finished off with a few Basics Peals in various sizes. I linked the decorations using Bakers Twine and of course as almost everything needs ribbon and or a bow, I cracked open a Crumb Cake double whammy using both the Seam Binding Ribbon and Scalloped Tulle Ribbon. And Voile! A beautiful hand made decoration to hang on your wall. I made a few more of the middle decoration to hang on their own on the tree:) What's your favourite Christmas Colour Combination?


post signature

Wednesday, 5 December 2012

Christmas is Coming!


Sorry about the picture...it's very dark outside! 
Last year, I very smugly, had all of my Christmas cards made by October, but this year life has been up dancing in my face distracting me and BAMB! December has appeared out of nowhere and I am completely unprepared for the season of goodwill! Last night my Dear One was out, I had 'Strictly' on Catch Up, and a faint glimmer of energy, so I grabbed the opportunity and and set a full scale production line in order to get my cards finished at last. I had an idea of how I wanted them to look so I made up a rough version and decided to just go for it. I'm determined to have them all handed out/ posted out by Sunday, as i hate having things hanging over me for too long.
 I adore the First Christmas Stamp set from the Christmas Catalogue, I wanted to keep the card simple to high light the beauty of the stamps, so I embossed the images in Gold Embossing Powder on an Elegant Eggplant Card-stock Base. I used the Finishing Touches Edgelit to decorate the base of the card and tied some Crumb Cake Seam Binding Ribbon to add a layer. The top looked a bit bare so I added some Basics Pearls and decided that it was done. Hurrah to have 1 thing ticked off my list of 1001 To-Do's before the 24th! 
New years resolution....Buy a better camera! Or I could just stop being lazy and taking pics on my phone :)

Sunday, 18 November 2012

Designer Fabric Bunting Quilt.


I have wanted to get my hands on some of the new Designer Fabrics since I first saw the Spice Cake Fabrics in the Spring Catalogue. Next to paper crafts, sewing has been one of my longest and greatest passions. I love the colours and designs on the Stampin' Up! Designer Papers so to be able to get those same designs and colours in fabrics was an exciting proposition indeed and what better excuse then the impending arrival of a sweet little one to our family. My SIL isn't due to pop until late December but that is a busy time in anyone's life, let alone a Crafter who is usually flat out through the whole month of December, gluing, cutting, and sewing for all she's worth! So I got in early to avoid the rush and ordered myself 3 sets of Designer Fabric from the new Catalogue : Comfort Cafe, Summer Smooches, and Twitterpated. I cut them into 8" squares and sewed them all together, this left me with enough fabric to a couple of other projects and to cut out this for the back:
There are some really gorgeous bunting inspired quilts out there on the Internet at the moment and I thought this would be a lovely way to dress up the back of the quilt, using my Pennant Parade Bigz Die made cutting out all those flags a doddle:)


My SIL is a mad Disney fan so to make the bunting a little more special I (gulp) cut into my precious Munki Munki / Heather Ross Stash to add a few little characters, Alice in wonderland, Pinocchio, Snow white, they mixed in so beautifully with the other fabrics, I finished the quilt off with a Kona Solid in Grey (?) not sure which one, for the binding. The colours all work together so well for a gorgeous serene palette. I LOVE it, I hope it will keep the sweet little one it's intended for, warm, for years to come.

post signature

Sunday, 4 November 2012

Delicate Doily Card.

The new Delicate Doily Die was just to beautiful to resist. I've not had the chance to delve into too many of its possibilities but I had to give it a test run as soon as it arrived. This is just a little 4"x4" card made out of Basic Black Card Stock, I cut the doily out if Whisper White and attached it to the card with a few very thin lines of Tombo glue. The bottom edge was cut using the Adorning Accents Edgelit, and then embossed with the coordinating embossing folder. The ribbon is a taffeta ribbon in Regal Rose and the finishing touch on the envelope was a simple black line of lace using the Viola's Lace Builder Wheel. Let me know what you think of it! I find it so hard to make very simple cards as I always want to add some 'fancy' but I quite like this just the way it is.

Monday, 29 October 2012

A Quilt For My Sweet One.

A quick change of direction. I thought I'd share the quilt I made for Little Miss, I'm sure it will be the first of many, but this was supposed to be her first Christmas present. I finished it some time in June... 6 months later then planned, but hey! Life happens:) I made it almost entirely out of my treasured Heather Ross Far Far Away, cotton double gauze which is just the softest fabric you can imagine. The pattern, is a free download from the Amy Butler website which I have had sitting around for while, I just knew it would suit this fabric line. The fairy tale fabric is just so perfect for my little girl and my favourite part is the Princess and the Pea print that I used for the border. It took some fussy cutting but was so worth the extra time and effort.The borders and binding are in Kona Solid Cerise, I'd Ummmmd and Ahhhhhd about using just double gauze for the whole quilt and was going to do the borders in a purple flower print from the Far Far Away line but opted for the Kona as I felt it added some solidity to the delicate surrounding fabric. I took these pics while we were in Italy, such a beautiful inspiring location even with such a reluctant model. I wish I was still there!  I hope this quilt snuggles my little one and keeps her warm for years to come.
Yes the back is upside down but you get the idea :)

Sunday, 28 October 2012

Pumpkin Treat

We don't really celebrate Halloween enough in our house, for me to justify getting a stamp set solely dedicated to the holiday, since the arrival of Little Miss however, I have felt the urge to celebrate it in some way. On our family night we take time to remember members of our family who have gone on ahead. Daddy did some pumpkin carving yesterday and whipped up some pumpkin pies. I roasted the pumpkin seeds in a little olive oil and sea salt for us to enjoy over the weekend, and made these Pumpkin Lollipop Holders for Little Miss to give any Trick or Treaters who might happen past the house on Wednesday.

     The holder was made using the scalloped tag on the Two Tags Bigz Die. The pumpkin is so simple to make, I just punched three Extra Large Ovals out of Pumpkin Pie Card stock (of course!) inked around the edges with some Soft Suede Ink, then stuck two of the ovals to the back of the other. The leaves are from the Bird Builder Punch. On the first pumpkin I traced and cut out a face from some Early Espresso Card stock but the thought of doing that for all of them quickly had me reaching for a pen! I finished it off with a small amount of Old Olive Taffeta Ribbon knotted around the bottom of the lollipop stick.

  I'm hoping to get a tutorial made up for the lollipop holder before December as I'm using the same design to make my advent calender this year, so keep tuned!

Thursday, 25 October 2012

Little by Little.

I had seen divided page protectors for sale in a craft shop and had fancied trying them, so when I saw them make an appearance in the new Stampin' Up! Catalogue I had to order a set and give them a go. What appeals to me is that sometimes a whole 12" x 12" page can seem overwhelming, and a lot of space to fill all at once, with these you can work on a little section at a time, the whole page can link up or each section can have it's own little theme, trying out a new stamp set in one, some punch art in another, maybe a section dedicated to journaling and telling the story. While I don't think this page flows very fluently, I had a lot of fun making it, playing with each little rectangle. I can't wait to try my hands at the different combinations that are in the pack. 
 
You may also have noticed that the albums are now Ring Albums instead of Post Albums. This was a change that I was delighted about, while there seems to be more variety here in the UK when it comes to Post Albums, I prefer the Ring style because it makes accessing your pages so much easier. You just turn to the page you want and pop the rings open. The amount of time I have wasted trying to reorganise my pages or add one in, unscrewing the posts, pages slipping everywhere! If you haven't tried Ring Albums before, give these a try you will not be disappointed, they are excellent quality, really sturdy, and come in two sophisticated neutrals. I went for the Crumb Cake 12"x12" but am sure that an Early Espresso 8"x8" Album will be sneaking into my collection fairly soon.

Saturday, 20 October 2012

Look At You GROW!

Since Little Miss was born I have taken literally thousands of pictures. The pile to be scrapped grows by the day and yet my free time is virtually non existent . Here I have tried to keep the layout really simple and it came together in around an hour. I love my new alphabet dies as they are going to save me a fortune in alphabet stickers as you can cut out only the letters you need and don't end up with loads of useless V's and Z's!

Monday, 15 October 2012

10 Minutes and Counting!!!

It's my Dads Birthday today, I wasn't supposed to be seeing him until this afternoon so I thought I would have plenty of time to sit and make him a really special card. But, as is the way with this crazy thing we call life an early morning dash to the doctors with my Little Miss and quite a long wait once we got there meant that I was left with all but 10 minutes to create a master piece! And this is what I whipped up, inspired by a picture I saw here I hand drew the guitar body and winged it from there:) I love you Dad, I hope you had a lovely day!

Supplies: CardStock: Crumb Cake, Early Espresso, Basic Black, Soft Suede, Whisper White. Bakers Twine. Brads. First Edition Specialty DSP. Snail Adhesive, Sticky Strip.

Saturday, 13 October 2012

A Most Excellent Workshop.


I had a delightful afternoon today spent stamping in the company of some lovely ladies at my first Christmas Workshop. We made 4 projects: and I started by walking them through how to make a very quick and simple but no less attractive, Christmas favour box. Next they tried their hands at the Sweet Pressed Cookie Stamp Set which I knew they would enjoy as much as I do. It  is such a great set for making impromptu gifts, or festive treats for a Halloween or Christmas party. Later we sat down to some card making. I showed them how to make two of the cards from the Autumn/Winter Catalogue.
We listened to carols and shared Christmas Stories and now I feel like I have made a good start on my card making, and can't wait to wade headlong into the ever growing list of projects that need to be completed by December.